
Contact sales now: info@ecommercetemplates.com
Ecommerce Templates > ASP Version Help > Customer login and wholesale / retail pricing
The customer login feature allows for wholesale pricing / tax / shipping exemption for login customers and page protection. This means it is possible to offer retail and wholesale pricing without the need for a second database as well as offering tax and shipping exemption to particular users. You can also restrict access to certain pages of your site. Customers can create their own account, view their order history and save billing and shipping addresses.
To enable the login you will then need to go to vsadmin/includes.asp and add the line (if it's not already present) enableclientlogin=true
To allow customers to sign up for an account you will need this addition to vsadmin/includes.asp
allowclientregistration=true
To force customers to login before purchasing add this to vsadmin/includes.asp
forceclientlogin=true
To remove the prompt on cart.asp to login then add this
to your vsadmin/includes.asp file
noclientloginprompt=TRUE
Customers will be prompted on checkout if they would like to log in or set up an account unless you have added the setting above.
There are more settings available on our parameters page.
If you would like to have a login status box on each page you will need to add one line of code where you would like the login box to appear. The code you need is the following:
<!--#include file="vsadmin/inc/incminilogin.asp"-->
Paste that into HTML / code view exactly where the login box should appear and make sure that it comes somewhere after the include lines:
<!--#include file="vsadmin/db_conn_open.asp"-->
<!--#include file="vsadmin/includes.asp"-->
<!--#include file="vsadmin/inc/languagefile.asp"-->
<!--#include file="vsadmin/inc/incfunctions.asp"-->
You should now be able to see the login box on your store.

Login Box
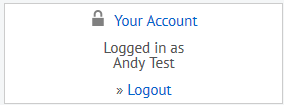
Login Box after successful login

Login Box if enableclientlogin=true
hasn't been set in vsadmin/includes.asp
There is also a one line minilogin available as well as a css based status box. Both are available in the css widgets package from our Ecommerce Tools page.
These are the screens you will see when the client login feature has been enabled.
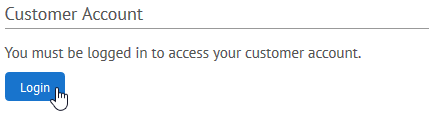
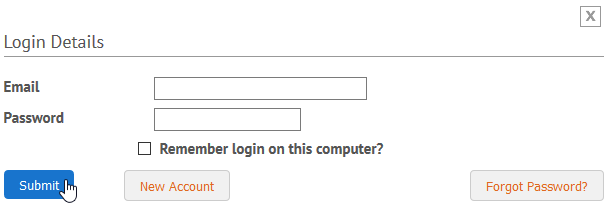
Login Dialogue on clientlogin.asp
Once you click on login you will be taken to a screen to enter your email address and password
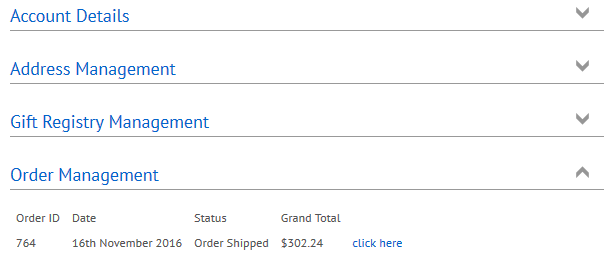
Once logged in and viewing clientlogin.asp customers can:
... view their account details
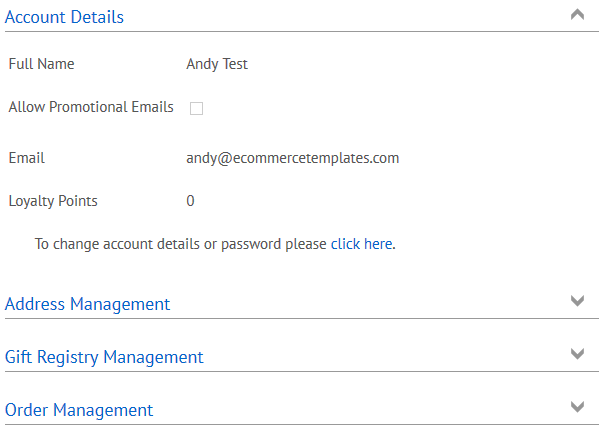
... edit their shipping and billing addresses
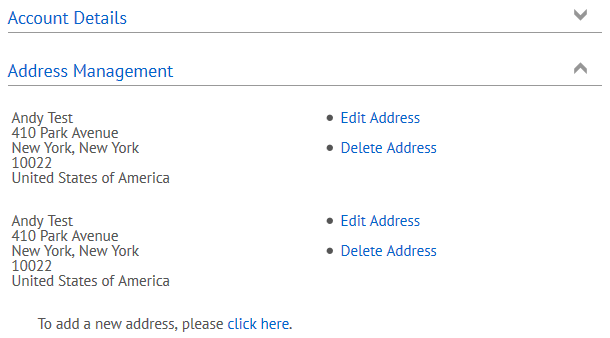
... as well as look up past orders.
In your home admin page there should be a link client login admin, click to set up your clients' options.
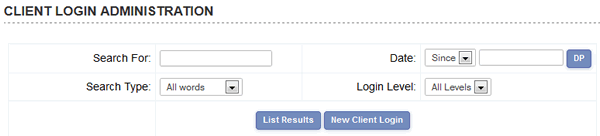
Click on new client login to add the details and parameters available for each particular customer or use the search feature to modify an existing client.
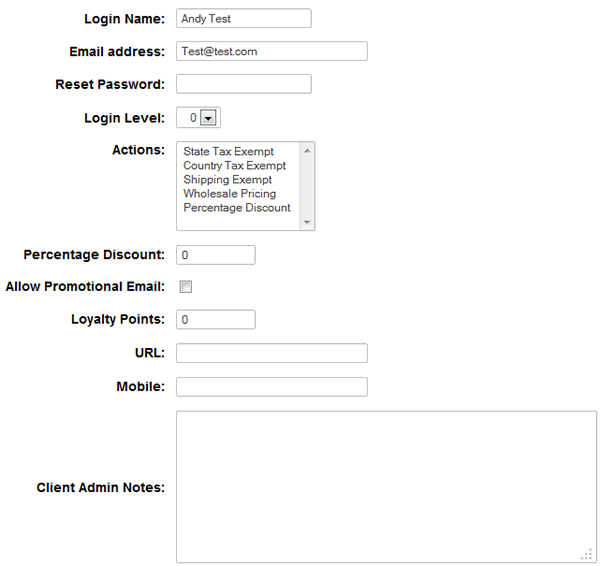
Enter the client login name, email address, password, the relevant action (You can use CTRL + Click to select more than one choice) and finally the login level if applicable.
If you need to add up to 2 extra fields to the customer login account (URL and Mobile in our example), that can be achieved through vsadmin/includes.asp
When done, click on submit and your client will have been set up with the parameters you have assigned. The promotional email box if checked will write the client's email address to the database and can be used for mail shots.
You can assign different levels of login permissions on any page to say that a particular page is restricted to anyone below the login level assigned in the login admin section. For example, if you set requiredloginlevel=4 then only people who you have set up with a login value of 4 or above can view the page when logged on. Only place the code on the pages where you need to restrict access, for example, it should not go on clientlogin.asp
To add the level of restriction to individual pages you will need to add the line:
<% requiredloginlevel=4 %>
...where 4 is the threshold of permission for that page. This needs to come anywhere before the line
< !--#include file="vsadmin/inc/incfunctions.asp"-->
From Version 4.9.0 it is now possible to limit certain payment methods to logged in customers if required. Just select from the "Login Level" dropdown in the payment provider admin page.
Increase the number of returning customers to your store by implementing the loyalty points system introduced in Version 6.1. Customers will be given a number of points depending on the value of items purchased and the points / cash ratio set by the store owner. These can be redeemed on subsequent orders or saved up for larger purchases. They can also be used to give store credit as the total points are editable through the control panel ![]() more details
more details
If you want to hide pricing and add to cart options from non logged in customers, add this to vsadmin/includes.asp
if SESSION("clientUser")<>"" then noprice=FALSE else noprice=TRUE
if SESSION("clientUser")<>"" then nobuyorcheckout=FALSE else nobuyorcheckout=TRUE
That means only logged in customers will see the price and buy / checkout buttons and those will be hidden from regular visitors.
This tweak is available for any of the parameters in includes.asp that you only want to apply to customers who are not logged into the store.