Contact sales now: info@ecommercetemplates.com
Ecommerce Templates > General Help > The Control Panel > Products Options > Alt Prod ID
The alt prod id feature allows you to assign a unique product reference to a product option by either creating a completely new id or modifying the existing product id.
This feature can be particularly useful in combination with stock management as you are able to control the inventory of individual items such as a setting stock on long-sleeved blue shirts rather than on the generic shirt product. It also means that each product id can have its own image associated without having to list them separately on the page.
As stock and pricing can be shown in real time, your customers will also benefit from the feature.
We are going to show you here how to set up a new alt prod id. The item is a t-shirt available in two sizes, large and small, and in two colors, blue and red. Each of the 4 combinations will have its own stock level, the pricing for the large size is different from the small and images will change depending on the color chosen.
The first thing we will do is set up the main product, which is the t-shirt. Go to the product admin page of your store control panel and select "New Product". For the time being, fill in the following fields as shown here

The reference here is important as values for size and color will be substituted in the final product id by "large" and "blue" for example. The price is set to zero but you can use a base price of say the cheapest option. If set to set zero, you would probably want to add this to vsadmin/includes.asp
pricezeromessage="Please select an option"
or to vsadmin/includes.php
$pricezeromessage="Please select an option";
The number of items in stock here doesn't come into play here so set it to "by options". Make sure you check the "Display Product" checkbox.
The next thing we'll do is set up the 4 alt prod ids so when the customer chooses an option the product id will reflect their combination of choices. The four products will have the following products ids tshirtlargeblue, tshirtlargered, tshirtsmallblue and tshirtsmallred. As you can see these are made up of the product name (tshirt), size (large or small) and color (blue or red). Here's the set up for tshirtlargeblue

The price you enter here is the price you are charging for the final product, in this case $30. If you had set a base price of 20 instead of zero, as in this example, then you'd want to enter 10 as the price. Enter the number of items in stock ie. how many large blue t-shirts you have available. Make sure you uncheck the "Display Product" box. If you want to show a picture of the product add the path to the image in the fields "Small Image" and "Large Image". Hit the submit button and then set up the other 3 products (tshirtlargered, tshirtsmallblue and tshirtsmallred) in the same way. When you finish you should see them listed in the hidden products listing like this.

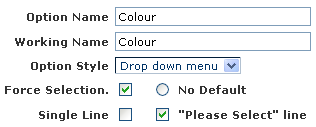
The final thing to set up are the two product options for Size and Color. Go to the product options admin page and click on "New Option" and fill out the details as below for the color


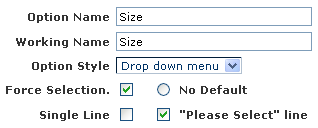
and then for the size


We have used a drop down menu here but you can choose to use radio buttons. Notice that there are no values set for price difference, stock or alternative product images as we have already set those in the alt prod id above. The important thing to note here are the values for Alt Prod ID under Options / Alternates. You'll see we have entered size large and size small. The way the system works is quite clever, it will look for an instance of the word "size" in the original product id (tshirtsizecolour) and replace it with the word to the right, for example "large", when the color is also selected that will replace the word to the right of colour, for example "blue". That will give us the final Alternative product ID of tshirtlargeblue, which will match the hidden product we set up in the step above.
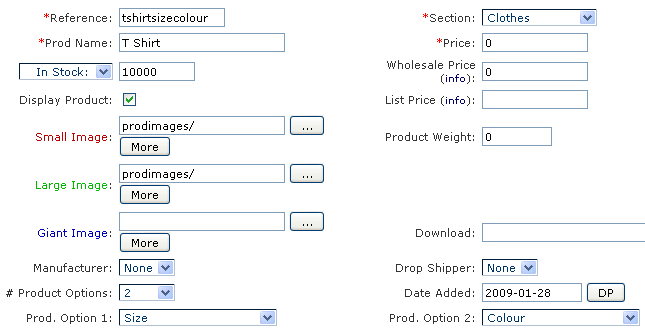
Now we have the options set up, we just need to add them to the original product (tshirtsizecolour)

Once you have saved your page, you should be able to test it out on your site.
In Version 6.5 we streamlined the Alt Prod ID feature so you can manage things much more easily through the product admin page. Once you have set up the options you can then go to the admin products page and click on the "Alt" button

This will give you a screen where you can manage the various options

Check the create box to enable a new Alt Product. Hover the image field to add small, large and giant images if required.
NOTES
The values are case sensitive, in the example above we have used all lower case and that's probably the simplest way to go.
The product id cannot include spaces but you can use hyphens or underscores for example. If you choose to call your original product id tshirt-size-colour then make sure that your alt prod ids correspond ie tshirt-large-blue or tshirt-small-red. You wouldn't need to make any changes there in the product options page.
If you run into any problems, check out the troubleshooting section below.
The example above showed how you can modify a product id through the use of product options. You can also create a new id. This might be useful if for example you wanted to allow the selection of another product with an existing one. For this example the main product is a laptop computer and you are giving the customer the choice of purchasing an extra battery so the laptop will have its own id as will the laptop plus battery.
First of all you would set up the laptop as you would any other regular product on your store, set the number you have in stock, the price etc and give it the product id of your choice. Make sure you select "Display Product".
Now set up a new second product which will be the laptop+battery. Again set the number you have in stock, price etc and give it a product id of "lapbat". Make sure you deselect the box for "Display Product".
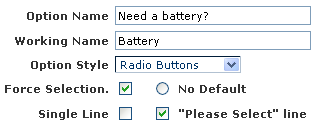
Finally you need to make the product option. We will make two choices available, "Yes please" and No thank you". The choice of "Yes please" will use the prod alt id of "lapbat".


The last thing to do now is to assign the product option you have just set up to the main laptop product. If the customer chooses to buy a battery with the laptop they will get a new product id. If they select "No thanks", just the laptop will be added to cart.
One of the most common problems is a message saying that a product is not available when adding to cart. Here's what you should check
If the product picture doesn't appear, make sure it has been added to the final product id and not to the product option. Check the path and the case sensitivity.