Use button style radio options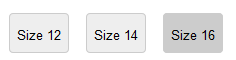 Please Note - the display in Internet Explorer and Edge will be different so please remember to check the display in those browsers too.
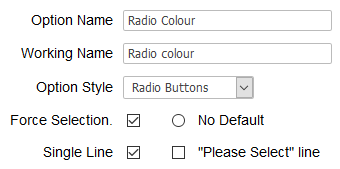
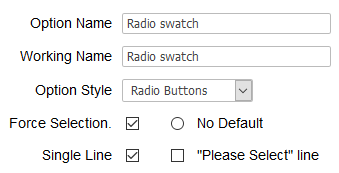
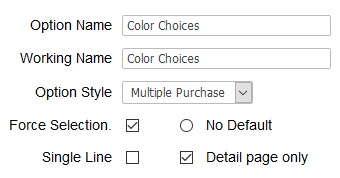
In your admin product option page select New Option and make it a radio button
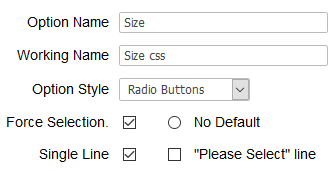
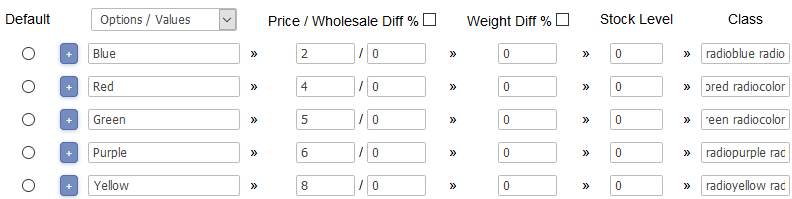
Enter the options you want to display

Set two classes for each option as one can be used globally (csssize) and one unique per option (size12 etc)
Add the following css to your css file
div.csssize span{display:none}
div.csssize input
{
-webkit-appearance: none;
-moz-appearance: none;
appearance: none;
display: inline-block;
position: relative;
background-color: #eee;
color: #666;
top: 0px;
padding:20px 30px;
border-radius: 4px;
cursor: pointer;
margin-right: 7px;
outline: none;
border:1px solid #ccc;
}
div.csssize input::before
{ position: absolute;
font: 13px/1 Arial, sans-serif;
left: 7px;
top: 15px;
color:#000;
}
div.csssize input:hover
{
background-color: #fff;
}
div.csssize input:checked
{
background-color: #ccc;
}
div.size12 input::before
{content: 'Size 12';}
div.size14 input::before
{content: 'Size 14';}
div.size16 input::before
{content: 'Size 16';}
.pinktop2 .detailoptiontext{display:none;}
@media all and (-ms-high-contrast: none), (-ms-high-contrast: active) {
div.csssize span{display:inline}
}
@supports (-ms-accelerator:true) {
div.csssize span{display:inline}
div.csssize input{padding:6px;background:#fff}
}
@supports (-ms-ime-align:auto) {
div.csssize span{display:inline}
div.csssize input{padding:6px;background:#fff}
}
_:-ms-lang(x), _:-webkit-full-screen, .headerClass{
div.csssize span{display:inline;}
div.csssize input{padding:6px;background:#fff}
}
doesnotexist:-o-prefocus, div.csssize span{display:inline;}
doesnotexist:-o-prefocus, div.csssize input{padding:6px;background:#fff}
The classes explaineddiv.csssize span{display:none}
<- Remove individual option labeldiv.csssize input
<- Style the button appearance{
-webkit-appearance: none;
-moz-appearance: none;
appearance: none;
display: inline-block;
position: relative;
background-color: #eee;
color: #666;
top: 0px;
height: 40px;
width: 60px;
border-radius: 4px;
cursor: pointer;
margin-right: 7px;
outline: none;
border:1px solid #ccc;
}
div.csssize input::before
<- Format the text in the button{ position: absolute;
font: 13px/1 Arial, sans-serif;
left: 7px;
top: 15px;
color:#000;
}
div.csssize input:hover
<- Set the background for the hover state{
background-color: #fff;
}
div.csssize input:checked
{
background-color: #ccc;
<- Set the background for the checked state}
div.size12 input::before
{content: 'Size 12';}
<- Set the text to display in the buttondiv.size14 input::before
{content: 'Size 14';}
<- Set the text to display in the buttondiv.size16 input::before
{content: 'Size 16';}
<- Set the text to display in the button.pinktop2 .detailoptiontext{display:none;}
<- Hide the main product option text label where in this case pinktop2 is the product id where the options are shownCheck if using Internet Explorer or Edge or Opera and display accordingly@media all and (-ms-high-contrast: none), (-ms-high-contrast: active) {
div.csssize span{display:inline}
}
@supports (-ms-accelerator:true) {
div.csssize span{display:inline}
div.csssize input{padding:6px;background:#fff}
}
@supports (-ms-ime-align:auto) {
div.csssize span{display:inline}
div.csssize input{padding:6px;background:#fff}
}
_:-ms-lang(x), _:-webkit-full-screen, .headerClass{
div.csssize span{display:inline;}
div.csssize input{padding:6px;background:#fff}
}
doesnotexist:-o-prefocus, div.csssize span{display:inline;}
doesnotexist:-o-prefocus, div.csssize input{padding:6px;background:#fff}
Andy
Please feel free to review / rate our software