
Contact sales now: info@ecommercetemplates.com
Ecommerce Templates > PHP Version Help > Payment Processors > SecurePay
![]()
Before installing and using this module, you will need to set up an account with SecurePay - SecureFrame.
Go through your store as a customer and purchase a product. Use 4444333322221111 for the credit card number, 123 as the CVV/Security Code and any future date as the expiry date.
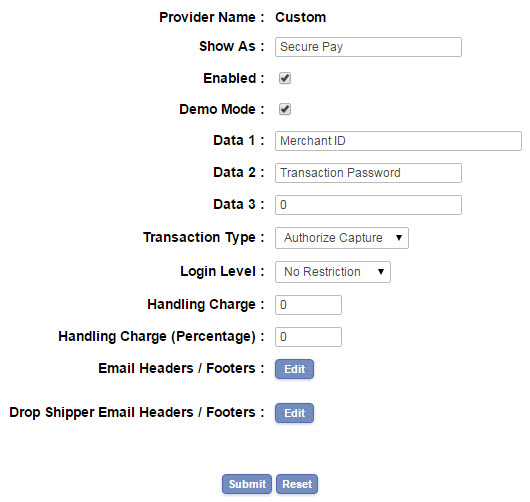
Enter a value from the following list in the Data 3 field, the default, and most common will be zero.
0 - PAYMENT: A card payment/purchase transaction. Note: This is the only accepted transaction type for PayPal payments.
1 - PREAUTH: Used to pre-authorise an amount on a card. The result parameters include the "preauthid" which must be stored and used when completing the pre-authorisation
2 – PAYMENT with FRAUDGUARD: A card payment/purchase transaction with the optional FraudGuard service
3 – PREAUTH with FRAUDGUARD: A card preauthorisation transaction with the optional FraudGuard service
4 – PAYMENT with 3D Secure: A card payment/purchase transaction with the optional 3D Secure service
5 – PREAUTH with 3D Secure: A card preauthorisation transaction with the optional 3D Secure service
6 – PAYMENT with FRAUDGUARD and 3D Secure: A card payment/purchase transaction with the optional FraudGuard and 3D Secure services
7 – PREAUTH with FRAUDGUARD and 3D Secure: A card preauthorisation transaction with the optional FraudGuard and 3D Secure services
That is, a value of "0" (or no value as it is the default) would be a standard "Payment" transaction type. "1" would be a "Authorize Only" transaction which would later be captured. Values above this are combinations of those two with FraudGuard and 3D Secure.
These can be set in vsadmin/includes.php if you want to include them
$sp_primary_ref_name= "Order Number";
Defines the label on the hosted pages for the Primary Reference field.
$sp_card_types="VISA|MASTERCARD|AMEX|DINERS|JCB|PAYPAL";
Defines the card types accepted. This must be a subset of the card types you accept.
$sp_page_header_image="https://yourstoreurl.com/images/header.png";
URL of an image to be used as the header of the hosted pages.
$sp_page_footer_image="https://yourstoreurl.com/images/footer.png";
URL of an image to be used as the footer of the hosted pages.
$sp_page_title="Your Store Name";
Defines the title text on the hosted pages.
Once you have tested the shopping process thoroughly follow the steps below when you are ready to take real credit card payments.