Contact sales now: info@ecommercetemplates.com
Ecommerce Templates > ASP Version Help > Payment Processors > Paygate

Once you have created your account with Paygate the first thing you will need to do is download the file paygateasp.zip from our downloads page. The zip file contains two files, customppsend.asp and customppreturn.asp. These contain all the information you need for the PayGate integration for the ecommerce templates. Unzip the download and place the two files in your vsadmin/inc/ folder, overwriting the existing files - agree to overwrite if prompted.
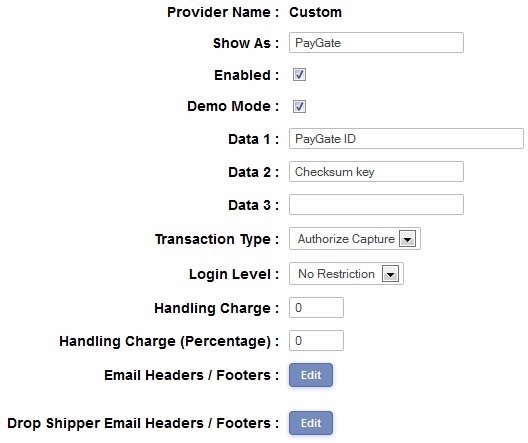
Make sure you have uploaded these two files to your server and open your ecommerce template admin payment providers page. Locate the payment provider listed as "Custom" and click on the Modify button. Fill in the details as shown below:

In the box Data1 you will need to place your PayGate ID and in Data 2 your checksum key.
You can test the system with the Test ID 10011013800, the Checksum field "secret" and then on the payment screen any cardholder name, credit card number 5221000000000002 and an expiry date of next month. Once you are happy with the results, place your unique Paygate ID in the Data 1 box and checksum key in Data 2 and you should be ready to go.
Please do read our guide here on credit card fraud.